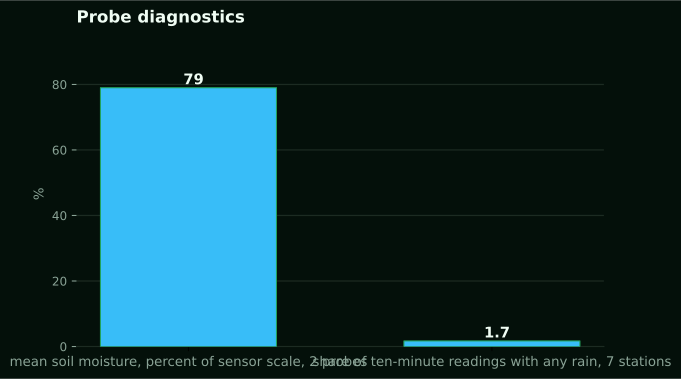
Soil moisture sensor problems rarely announce themselves. Our network recorded soil moisture averaging 79 percent of sensor scale across 2 NuaSense soil probes between 11 September and 11 October 2026, with most readings between 72 and 86 percent. That is a narrow band for a month. Over the same period the weather stations logged rain in only 184 of 10982 ten-minute readings (1.7 percent). A grower who sees a flat, high trace through a month like that could decide the soil is simply holding its water. Or decide the probe has stopped working. Neither conclusion is safe without a check, and the check is the subject here: no error message, just a number you have to decide whether to believe.
Scale matters here. Our probes report relative moisture as a percent of sensor scale, not calibrated volumetric water content, and 60 to 85 is normal on that scale. So 79 does not mean a wet field in the sense that 79 percent of anything is water. It is a position on the probe's own scale. Every judgement below looks at the shape of the record over time, not the absolute figure.
Why a quiet trace proves very little
A real soil record has shape. It climbs when water enters, drops as roots and evaporation pull it down, and the two depths in a probe pair disagree in predictable ways, with the shallow one reacting first. A fault normally breaks that shape, or leaves it intact and shifts the whole record by a fixed amount, which is harder to spot.
The soil temperature channel can act as a witness. On our probes, the steadier depth moved through 1.4 °C over the month, while the more variable one moved through 2.4 °C. If you take the steadier span as one, that is a factor of 1.7. The difference is physical: the two depths sit in different thermal conditions. If a pair of temperature channels suddenly tracks exactly the same, or one stays perfectly constant while the other keeps moving, the sensor is telling you about itself, not the soil.
One limit on the evidence. The sources behind this piece list field failure modes, but none describes an air gap at the probe or a root pressing on it. None ties a flat line to a specific fault. For those cases, what follows is reasoning from maintenance and validation practice, flagged as built, not quoted.
The faults the literature does name
Start with the University of Arizona Extension guide to maintaining and calibrating field-installed moisture sensors. It lists what limits sensors in commercial fields: design limitations, battery failures, probe corrosion, mineral buildup, damaged cables, sensor displacement and wireless connectivity problems. The guide also says sensors drift and need frequent recalibration. It gives no interval, so nobody can honestly tell you to recalibrate every season.
Sort that list by what it does to a record. Battery and connectivity failures leave gaps or erratic values. Cable damage, which the guide links to rodents and loose connections, does the same. Corrosion and mineral buildup change the probe slowly, so they look like drift. Displacement is the odd one: the soil it reads is no longer the soil you installed it in, and the result can be a step no weather explains. Ask whether the oddity is a gap, a slide, a step or a flat line. Each one points at a different fix.
Drift: slow, and easily mistaken for a season
Drift is the fault most likely to pass as weather. A probe sliding gently downward over weeks looks just like a crop drying the profile. The Arizona guide frames drift as partly climate-driven: in that state's hot, arid conditions, extreme heat speeds up drift and probe wear, and saline irrigation water affects electrical conductivity measurements. That is an Arizona finding. Kenyan blocks are mostly cooler than a desert, so do not assume the same pace, but borehole water with high salt content is a real feature at some Kenyan sites. The mechanism travels even if the rate does not.
Temperature can trip you up as well. A CGIAR report on the combined effect of temperature and soil conditions on dielectric sensors notes that heat may throw off dielectric sensors by acting straight on their circuitry. So if your moisture trace climbs and falls with the daily temperature cycle, and no rain or irrigation explains it, be suspicious. Check it against the soil temperature channel on the same probe.
Expect some normal error too. The Frontiers work on a low-cost handheld sensor reports that dielectric sensors like HydraProbe, ThetaProbe and TDR 100 have shown an RMSE under plus or minus 0.04 m3 m-3, and that its calibrated handheld matched HydraProbe and ThetaProbe at R above 0.90. Those are volumetric figures from other instruments, so they do not carry over to our scale. The point still holds: a healthy sensor wobbles, and a small wobble is not a fault.
Here is what to do. Pick a stretch with no rain and no irrigation. A real drawdown follows the crop and the weather, and gets steeper on hot days. A drifting probe just slides down at a steady rate no matter what. Then confirm with the oven check below, since judging a slope by eye is how good probes get retired and bad ones kept.
What the soil itself does to accuracy
Before you decide a probe is broken, look at the soil it sits in. The Frontiers study on a low-cost handheld soil moisture sensor calibrated against 408 soil samples from 83 locations. In mineral soils, a generalised calibration gave an RMSE of 0.035 m3 m-3, while soil-specific calibration gave 0.031 for loam and 0.034 for sandy loam. In forest organic soil the error climbed to 0.078, with a weaker correlation of R = 0.80. The soil changed the error by more than a factor of two.
Those numbers belong to that sensor and those soils, and say nothing about our probes. The principle is what carries over. The Arizona guide adds that compacted, gravelly or high-salinity soils can give biased readings. A Kenyan block with a stony layer, a hardpan or a heavy organic topsoil may therefore give a reading that is consistent and wrong for what you want to know. A biased reading looks healthy: it will not drift, gap or step. The fix is a local reference, which how to calibrate a soil moisture sensor on your own field builds from field capacity outward.
Air gaps and roots: reasoning without a source
No source in this research describes either fault. An air gap making a probe read dry, or a root making it read wet, cannot be cited, so neither is claimed here. What can be said is what the logic of the method implies, and how to test it.
The Frontiers calibration took three readings in a triangular pattern around a point, averaged them, and compared them against a cored gravimetric sample from the centre. The design assumes a reading at one spot describes that spot, not the soil. A probe is the same. If its contact with the soil is poor or unusual, whether from a void left at installation or something growing against it, the reading describes that contact rather than the profile. That is an inference, not a measured result.
The test costs little. Compare the probe with a cored sample at the probe, plus a reading taken a short way off in similar soil. If probe and core agree, contact is fine. If they disagree and the nearby reading sides with the core, the problem is local to the probe, and reseating or moving it is the next step. You never need to know which cause it was.
A flat line has at least four explanations
No source links a flat reading to a broken sensor, and if one did, you should question it. A flat line can mean a dead sensor, a stuck value, a probe sitting in soil that really is steady, or a gap patched by copying the last value. That last one is something to test for, not a recorded behaviour. You have to tell these apart, starting with the cheapest checks.
Check the other channel first. Suppose the moisture line sits flat while the temperature channel on that same probe still rises and falls with the day. Then the electronics are alive and sending data. If both channels are flat, look at power, cable or link. Those are the failure points the Arizona guide lists. It notes wireless sensors especially can suffer battery depletion and connectivity problems, which can lead to data loss or erratic measurements. After that, pull the weather record for the same period. Soil can stay steady when nothing is taking water out, but a month with rain or irrigation events and no response at all is not steady soil.
Next comes the physical test. Take a gravimetric sample right at the probe. If the sample disagrees with the flat number, the probe is the problem. If it agrees, the soil may actually be stable, and that tells you something about the block. One comparison is not enough. Repeat it after the next irrigation or rain. A stuck probe and stable soil only show their difference when the water content changes.
The VIA programme, described by AICCRA in its account of tech-backed irrigation in eastern and central Africa, goes at the whole problem a different way: its chameleon sensors turn blue when soil is too wet, green when moisture is enough and red when too dry. A colour bin gives the farmer no number to interpret. That same account reports income gains but does not mention recalibration intervals, so it is silent on how those sensors age.
The oven check, step by step
The sources give one procedure for separating a drifting probe from a real field. The Arizona guide says to compare installed sensor readings with a known accurate sensor or a soil-drying oven, on the same soil and under the same conditions. That validates moisture readings and identifies drift or offsets. The Frontiers paper calls the gravimetric method the most reliable approach. It is labour and time intensive, cannot give real-time readings, and is destructive.
- Take a soil sample beside the probe, not under it, so you do not disturb the installation.
- Weigh it fresh in a tray whose weight you know.
- Dry it in an oven at 105 degrees Celsius until the weight stops changing.
- Subtract the tray weight from the fresh and dry weights, then work out the water as a share of the dry soil.
- Note the probe's reading at the moment of sampling, and repeat at a wet and a dry point.
Two cautions. Gravimetric moisture is a mass ratio. To convert it to a volume basis, you need bulk density. The Arizona guide gives approximate field values: about 1.4 to 1.7 g/cm3 for sandy soils, 1.2 to 1.5 for loamy soils and 1.0 to 1.3 for fine-textured or clay soils. Our probes are not volumetric anyway. So you are not matching numbers. You are checking that the probe's scale rises and falls in step with the oven result across a wet point and a dry point. That is the sensor standardisation idea the guide offers as an alternative to full calibration: interpret by relative response to irrigation events, not absolute values.
Which checks travel to a Kenyan block
The Drought.gov soil moisture data quality guidance says flagging data as unreliable when soil is frozen or close to freezing matters in temperate, polar and high-elevation regions. Most Kenyan growers have no equivalent. Quality-control practice depends on climate. Import a checklist whole and it will carry rules you never need while missing ones you do.
Access is what Kenya adds. The AICCRA account notes that moisture sensors used in East Africa are usually made in Southern Africa. That makes them hard and expensive for most farmers in Eastern Africa to get. It also notes that less than five percent of cultivated land in sub-Saharan Africa is irrigated. So many blocks have one probe and no spare, and no second opinion. The FAO guidance on field measurements suggests one to three lines of stakes placed 20 to 30 metres apart, so a single point is never asked to stand for a field. A probe is a point. On a large block, one probe checked by one core is evidence about that spot.
What our own equipment does here, and who should skip it
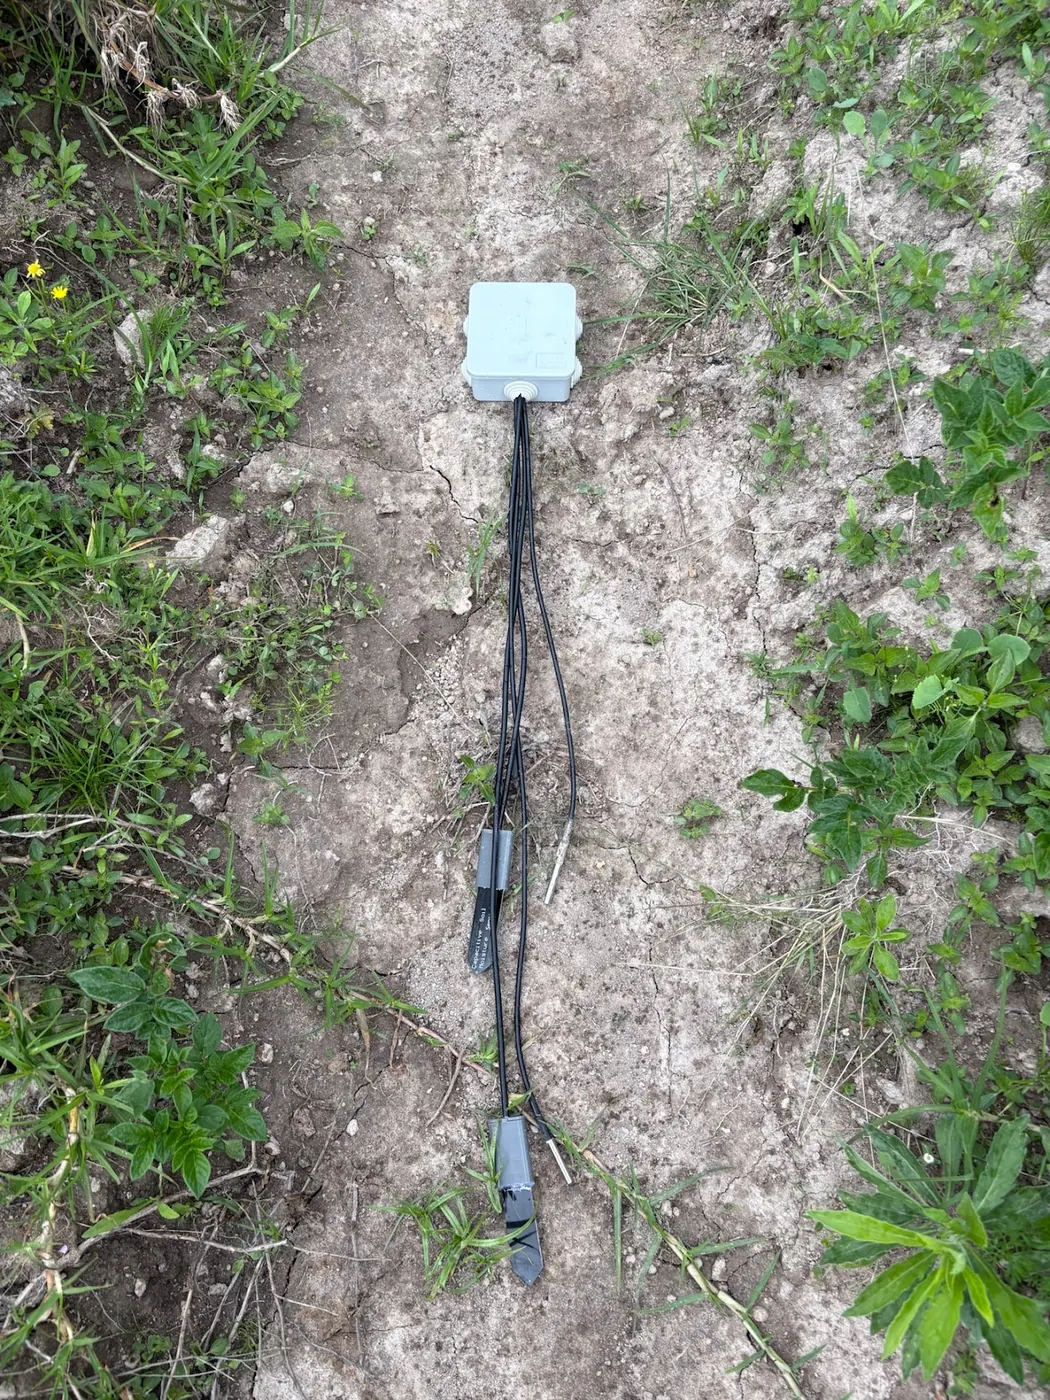
A NuaSense soil sensor sends relative moisture and soil temperature readings from two depths, the shallow probe and the deeper probe, about every 10 minutes over LoRaWAN to the weather station. That station then carries the readings to the internet. It costs KES 7,000 excluding taxes. A version with two moisture and two temperature channels runs KES 9,000. One that also measures EC is KES 10,000. The weather station costs KES 30,000. EC is offered as a product, but it is not currently streaming from our deployed soil fleet.
For troubleshooting, the design helps in two ways. Each depth has a temperature channel alongside moisture. That gives you the liveness check above. Two depths also give a second view: if the shallow and deeper traces stop behaving like a pair, that is a stronger signal than either one alone. See soil moisture sensors and soil temperature sensors.
Who should not buy one? Anyone who wants calibrated volumetric water content in m3 per m3, because ours is percent of sensor scale. Also skip it if you are unwilling to take an occasional soil sample, since no probe removes the need to ground-truth. On a very small plot, a feel-and-spade routine may serve well enough. The crop moisture range post covers building your own upper and lower marks from your own record.
What to change on Monday
Pull the last month from each probe. Sort every oddity into gap, slide, step, flat line or plausible-but-suspect. It costs nothing and points you to the fault to chase.
- For any flat line, check the temperature channel on the same probe and the weather record before blaming the soil.
- For any slow slide, find a stretch with no rain or irrigation and see whether the fall tracks the weather or ignores it.
- For any step change, go and look at the probe. Displacement and cable damage are on the Arizona list for a reason.
- Take one oven-dried sample beside a probe you rely on, at a wet and a dry point, and see whether the scale moves with it.
- Write the date and result next to the probe's record, so the next person does not start from zero.
No one has published a Kenyan table of probe faults, and this piece cannot hand you one. What you can build in a week is your own: a short log of what each probe did when healthy. That is the only baseline against which a fault is visible. For the wider case for sensors on working farms, see NuaSense's piece on IoT applications in Kenyan agriculture.