Measured by NuaSense weather stations and soil probes on Kenyan farms, over the period stated with each figure. Past readings, not a forecast.
The bed on a Monday morning, and four ways to measure it
You buy a greenhouse soil moisture sensor to settle one question: does the bed under the drip line need water now, or can it wait until after lunch? Everything else on the leaflet is decoration. The bed in question is soil, not coir or pumice, with a drip line running along it and emitters pulsing a few times a day. Whoever is reading this is likely standing at the door of the house with a phone in hand, a budget that still has to cover plastic and seedlings, and a nagging feeling that last week's irrigation was off in one direction or the other.
There are four ways to answer that question, and they run from free to a few tens of thousands of shillings. Push a trowel into the bed beside the line. Buy a handheld reader and spot-check. Bury one probe at one depth and leave it there. Or bury a two-depth probe that reports to a phone roughly every ten minutes. For more greenhouses than a sensor company would care to admit, the cheap end is the right call.
What makes a drip bed harder than an open field is the wetting pattern. The University of Arizona's guide to field-installed moisture sensors names uneven wetting from drip and shallow sampling depths as the two things that most complicate reading the data. Stick the probe in the dry strip between lines and it says the bed is parched while the roots are sitting in mud. Put it against the emitter and it reads saturated for an hour after every pulse. Placement is the whole purchase.
Four options side by side
Lay the options out before any hole is dug. Where no price is published I say so rather than make one up.
- Trowel and a squeeze test. Costs nothing. Buys a feel for the top of the bed at the moment you check, biased towards the surface. Right for a single small house with one crop and a grower who is in it twice a day anyway.
- Handheld reader, pushed in at several points. The low-cost handheld in the Frontiers study agreed with commercial HydraProbe and ThetaProbe sensors at a correlation above 0.90, so the cheap end is not junk. No Kenyan shelf price appears in the sources. Buys a snapshot wherever you push it, nothing between visits, and a number that needs soil-specific calibration before it means anything absolute.
- Single buried probe read by cable or a local display. The greenhouse sensors assembled under FAO's Digital Villages Initiative in Uzbekistan cost under USD 100 each on Arduino or ESP32 boards. Buys a continuous trace at one depth and one spot, plus a maintenance list you own.
- Two-depth probe with telemetry. Buys a shallow and a deeper trace on a phone, and the drying slope between pulses. Costs the most and only pays when somebody reads it.
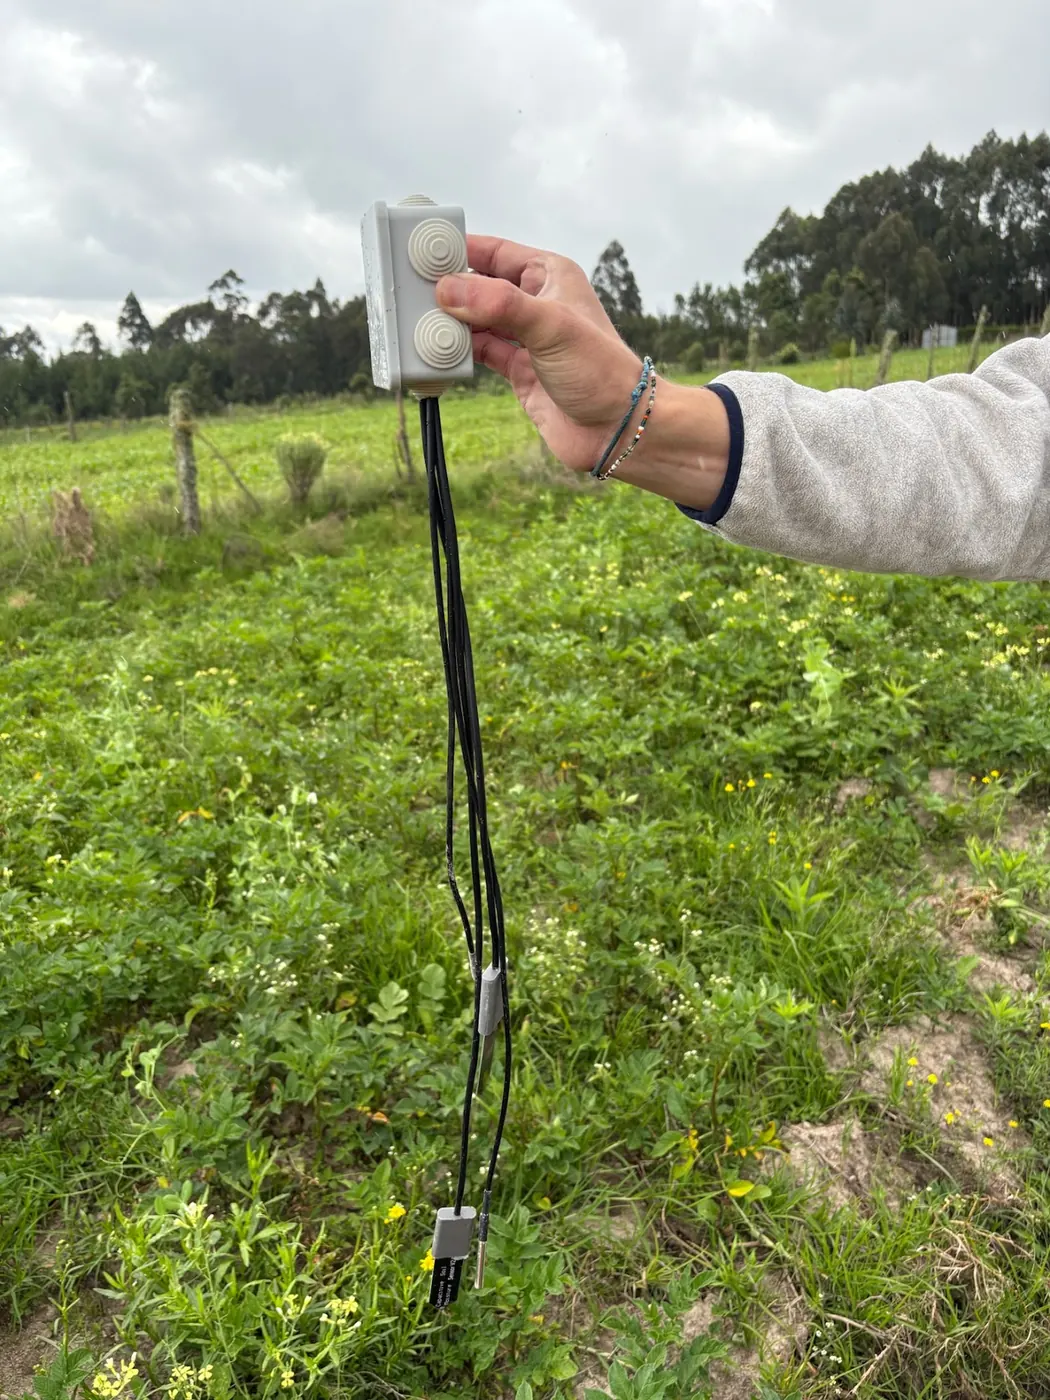
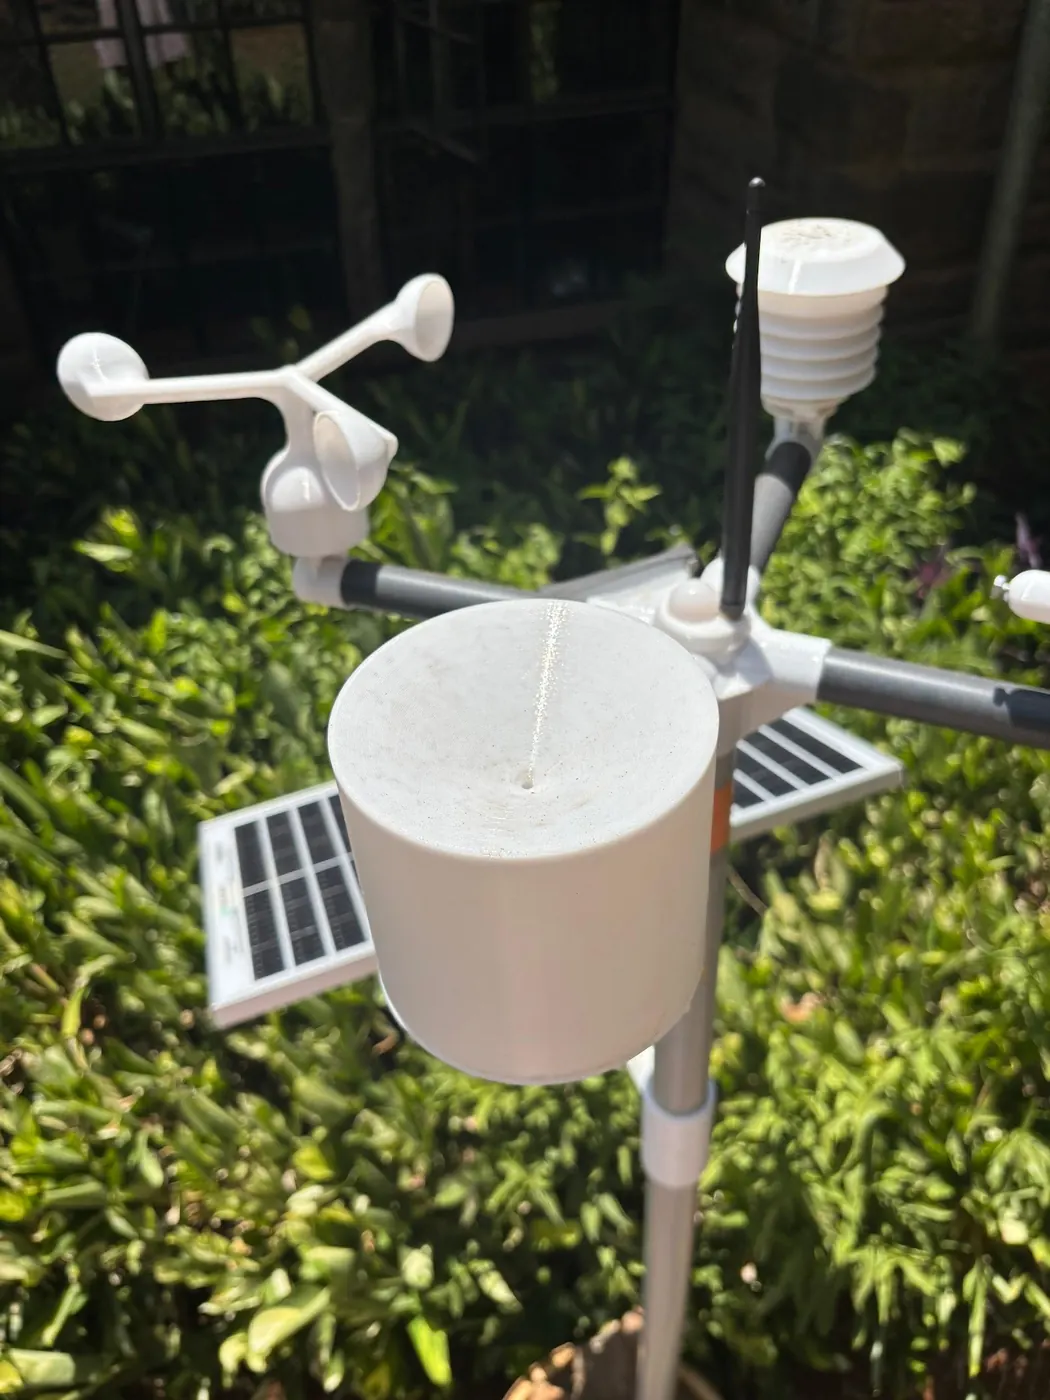
On that last row, the only figure I can give is our own: KES 7,000 excluding taxes for a NuaSense soil sensor, KES 9,000 for the variant with two moisture and two temperature channels, and KES 10,000 for the version that also measures EC. It reports over LoRaWAN through a NuaSense weather station at KES 30,000, which carries the readings to the internet; there is no separate box to buy. If you run one house with one bed type and walk it every morning, do not buy this. Buy a handheld, calibrate it as described below, and spend the difference on filters. Telemetry earns its price when you have several houses, a worker opening valves who is not the owner, or pulses the grower never personally sees.
Depth: the roots choose it, and a greenhouse bed drinks shallow
Depth matters before distance, because moving sideways cannot rescue a wrong depth. The Utah State drip irrigation guide, written for landscape beds, gives the target that transfers best: wet 50 to 60 percent of the active root zone, then let the profile dry between irrigations. The probe's job is to watch that drying, so the shallow probe belongs where the crop is actually taking water, not where the bed looks wettest.
No source in this bank gives a centimetre depth for a greenhouse soil bed, and our own probes do not carry a published depth either: burial is chosen per installation from the rooting pattern of the crop. That is deliberate. A bed of transplants in their second week and the same bed at fruit set do not drink from the same depth, and a figure printed on a box would be wrong for one of them.
Our own soil temperature record shows what two depths buy. Across 15 NuaSense soil probes between 09 October and 08 November 2026, the steadier depth moved through 3.5 °C for the whole period while the more variable depth moved through 39.9 °C, a factor of 11.4 if the steadier span is taken as one. The moisture channels sit on the same two probes. A depth that swings that much in temperature under a plastic roof is also the depth that dries first after a pulse; the deeper one tells you whether a pulse reached the roots or only wet the surface. The soil temperature sensors page explains the two channels.
So the rule for a drip bed is plain. Shallow probe: at the depth where you find the densest fine roots when you lift a plant from the end of the bed. Deeper probe: below that, where water you do not want to lose is heading. You dig, you look at the roots, you choose. Nobody can do that from a catalogue.
Distance from the emitter follows the soil, not a tape measure
Most placement mistakes start with distance. To be straight with you, none of the sources here puts a probe-to-emitter gap in centimetres. They do give how far water moves sideways, and that is the figure to work from. The probe must sit inside the wetted bulb, not at its centre.
Colorado State Extension's drip guide for home gardens puts emitter spacing at 12 inches in sand, 18 inches in loam and 24 inches in clay. That spacing is set specifically to compensate for lateral water movement in each texture. Turn it around and you have a placement rule. Sand gives a narrow wetted bulb, so a probe a hand's width from the emitter may already be in dry soil. Clay gives a wide, flat bulb, so the same probe sits well inside it. The same guide notes that a plant needing one or two emitters in clay may need two or three in sand to wet a wide enough area. It also warns that the common setup mistakes are a missing filter, a missing pressure reducer and too many emitters on one line. Put a probe in a bed with uneven pressure and it reads the plumbing fault, not the soil.
Those spacings come from Colorado gardens with factory emitters. A Kenyan greenhouse bed on hand-laid tape, often loaded with manure until it acts like neither the loam nor the clay on the soil map, will not follow the table. What transfers is the method, not the inches. Run a pulse, wait, then scrape across the bed at right angles to the line and mark where the dark soil ends. That edge is the lateral reach for that bed on that day. Repeat it a few weeks later: a bed with roots in it wets differently from one just planted. Repeat again if you change tape or emitter type, because a different flow rate draws a different bulb.
Place the probe between the emitter and that edge, closer to the edge than to the pipe. Right against the emitter, it reads near saturation after every pulse and shows you the plumbing. At the dry edge, it never moves. In between, it rises with the pulse and falls as roots and evaporation pull the water back. That is the trace you paid for. Our soil moisture sensors page shows how that trace looks on a phone. If no position gives a reading that both rises and falls within a day, the bed is being over-watered or the probe sits outside the bulb. A trowel settles which.
One probe or two
Everyone wants a number: one probe per bed. The Arizona guide refuses to give it. It says deploying multiple sensors at various depths and locations improves reliability, because a single shallow sensor under uneven drip wetting is the arrangement most likely to mislead. Put more bluntly, one probe at one depth in a drip bed is a coin you are paying to flip.
A second sensor can go in one of two ways, and the two are not equivalent. Another depth at the same spot tells you if water is passing the roots. Another location along the bed tells you if the first spot is typical. In a drip bed, the depth pair wins. The costly mistake under plastic is pushing water past the root zone, and only a deeper probe can see it. A two-depth probe in one hole answers that for the price of one unit. That is why our sensors are built that way, not as two single-depth sticks.
Coverage comes after that. The Frontiers calibration study of a low-cost handheld sensor took three readings in a triangle at each of its 83 locations and cored the centre for a gravimetric sample. That triangle is the cheapest second opinion available. Before buying a second buried probe, walk the bed with a handheld and take three readings around the installed one. If the three sit close to the trace on the phone, the spot is typical and the second unit can wait. If they scatter, you have found the gap a second unit would fill, and you know which end of the bed to put it in.
The wet anchor, the threshold and the slope between them are the three numbers that the earlier piece on reading soil moisture worked through. They only mean something if the probe reporting them sits in soil the crop actually uses. A perfectly calibrated probe in the dry strip between two lines is a perfectly calibrated irrelevance.
Reading the bed between pulses, without a laboratory
Between pulses the trace does the work. The Arizona guide shows how to read it without an oven or a calibration curve. When the bed is visibly saturated after irrigation, treat that reading as your near-saturation reference. The reading just before the next irrigation is your field-specific threshold. What falls in between is a relative drying trend. That is standardisation, not calibration, and for a drip bed it is the honest way to work.
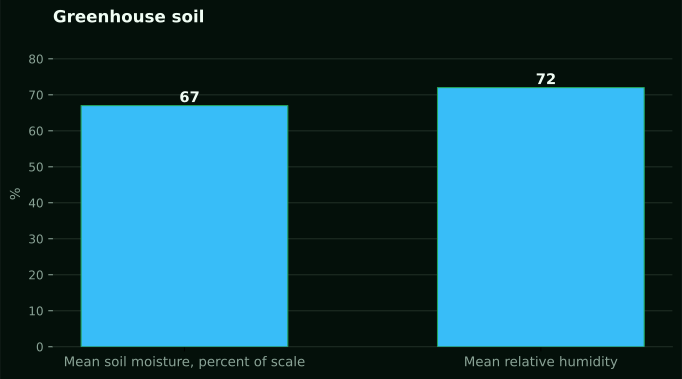
That is also why our probes report percent of sensor scale instead of volumetric water content, and why a reading of 60 to 85 on that scale is normal, not alarming. Across 15 NuaSense soil probes from 09 October to 08 November 2026, both depths pooled, the average came to 67 % of scale, with most readings falling between 39 and 86 %. Those figures are not litres per cubic metre of your bed, and you must not convert them into any. They are the two anchors Arizona describes, found probe by probe and bed by bed.
So a greenhouse trace looks like a sawtooth. Each pulse lifts the shallow channel sharply. The deeper channel either rises a little later, rises on every pulse, or sits still for days. A later, smaller rise tells you the pulse is reaching the deeper roots and stopping there, which is what you want. If it rises on every pulse and stays high, water is passing the root zone, and the pulse is too long or too frequent. No movement at all means one of two things: nothing passes the shallow zone, which is acceptable while roots are shallow, or the deeper probe sits outside the wetted bulb.
You make the irrigation call off the shallow channel's fall. When it drops to the pre-irrigation reading you noted on the day the crop looked right, you pulse. When it gets there sooner than yesterday, the house is hotter or the crop is bigger, so you pulse sooner. The number never has to be true in absolute terms. It only has to be the same probe in the same hole.
How low to let the shallow reading fall
The threshold is the one number the sources will not hand a Kenyan grower, and I will not invent it. What they do give is the shape of the answer. A calibrated time domain transmissometry trial in soilless substrate, run with an Acclima controller that held six thresholds from 0.136 to 0.472 m3 per m3 within 0.008, found begonia dry weight was similar at 0.348 m3 per m3 and above, while total evapotranspiration kept climbing linearly with the threshold. Only the lowest threshold cut leaf size, net photosynthesis and stomatal conductance.
It is begonia, in substrate, under a research controller. That 0.348 figure belongs to that pot mix and cannot be carried over to a soil bed, let alone to percent of sensor scale. What transfers is the shape. Above some threshold, each extra bit of wetness buys extra water use and no extra plant. Below some lower threshold, the plant pays. The pre-irrigation reading should sit in the gap between the two, and the only way to find it for a bed in a Kenyan house is to lower the threshold a step at a time while watching the crop.
Note the pre-irrigation reading on the shallow channel. Let the next cycle run a little lower before you pulse. Watch for the signs the begonia trial saw: smaller new leaves and a plant that looks tight in the afternoon. The step before that is your threshold. Write it on the wall of the house, because it belongs to that bed, that depth and that crop stage. A threshold copied from a substrate trial in another hemisphere is a precise number about somebody else's begonias.
Correlation is not accuracy: an R squared of 0.99 that still reads low
A sensor leaflet that quotes a correlation is telling you half the story, and the TDT trial above is the clearest warning. Against gravimetric samples, the TDT sensor achieved an R squared of 0.99 in the substrate, and it still underestimated volumetric water content by about 0.08 m3 per m3. Perfect tracking, consistent offset. For a controller holding a relative threshold, that offset is harmless. For a grower who reads the number as the truth about the bed, it is a quiet, permanent error.
The handheld side tells the same story from the other direction. Frontiers' low-cost sensor was calibrated on 408 samples from 83 sites (70 mineral soil, 13 organic) and came out at a generalised mineral-soil RMSE of 0.035 m3 per m3, bias under 0.001, correlation 0.90. Calibrate it to a specific soil and that tightens to 0.031 for loam and 0.034 for sandy loam. On forest organic soil it fell apart: RMSE 0.078, correlation only 0.80. The TDT trial also found Theta and Sigma probes followed moisture at an R squared of 0.92, but bulk electrical conductivity at only 0.53. That matters if the box you are offered claims salinity as a bonus.
For Kenya, the organic soil line is the one that transfers. Greenhouse beds here are routinely built up with manure and compost, until the top layer looks closer to the forest floor in that study than to the mineral loam the general calibration was built on. So don't ask a seller for the correlation. Ask what the bias is in a soil like yours, and who measured it. If you get a shrug, the reading is relative. Treat it with the Arizona standardisation above and don't trust its decimal places.
What breaks, and the salt that moves the number before the water does
Read the Arizona guide's list of how field-installed sensors fail, then read it again: battery failure, probe corrosion, mineral buildup, damaged cables, sensor displacement, wireless dropouts. Every one of those is a greenhouse problem. Beds get hoed, lines get lifted and re-laid, workers step where the probe sits, and fertigation leaves salt on everything it touches. A cheap probe with no upkeep plan becomes an expensive one by the second crop.
The same guide says texture, salinity and temperature variation significantly affect readings, that sensors drift, and that under Arizona's hot, arid conditions standard calibrations often fail in sandy, clay and calcareous soils. A plastic house in Kenya is not Arizona. But a fertigated bed under a roof concentrates salt the way an arid field does, and the probe reads that salt as water. Salinity under drip needs its own measurement, as the piece on soil EC under drip explains: one reading at one spot misses the ring of salt at the edge of the wetted bulb. EC is a product variant on our list but is not currently streaming from the deployed fleet. Don't assume you have it until you see it on the dashboard.
You can check a drifting probe yourself with the gravimetric method the Arizona guide describes. It needs only a kitchen oven: take soil from the same depth as the probe, weigh it fresh, dry it at 105 °C to constant weight, weigh again, and convert to volume using bulk density. The guide's field values are 1.4 to 1.7 g/cm³ for sandy soils, 1.2 to 1.5 for loams, 1.0 to 1.3 for clays. The Frontiers paper calls gravimetric sampling the most reliable method, and also labour-intensive and useless for real-time decisions. It is the referee, not the player. Before you buy any radio-linked probe, ask whether the Communications Authority of Kenya has type-approved it. Ask to see the approval, not a number on a leaflet.
The interface is the product, and sometimes the right purchase is none
Of all the greenhouse sensor projects in this bank, the most useful one is not useful because of its sensor. FAO Agritech Observatory account of low-cost IoT sensors for greenhouse monitoring describes ten smallholder greenhouses in Novkent, Yukhsalish and Dustlik in Uzbekistan's Fergana valley, three of them run by women, fitted with sensors for air temperature, humidity, soil moisture and light, with drip control attached. FAO green practices repository entry for the same project puts the hardware under USD 100 each. What made the data usable was a Telegram bot delivering readings and alerts in an app the farmers already had open.
Nothing in that project has been tested in Kenyan soil. But the lesson travels without a calibration curve: a probe nobody looks at is a stick in the ground. AICCRA's training in Uganda's Mubuku Irrigation Scheme put chameleon readers, wetting front detectors and EC meters in front of 70 participants, 46 men and 24 women. The tool only pays once the reader knows which number to act on. In Kenya the app people know is WhatsApp, which is why our alerts go out there and by SMS at 0.03 US dollars a message, switchable by the grower.
So where does that leave you? One house, one bed type, your own hands on the valve: buy a handheld, triangle-check the bed, standardise it against your own wet and dry anchors, and keep the money. A worker on the valves, several houses, or pulses that run while you are at the market: bury a two-depth probe in the wetted strip at root depth and let the phone watch the slope. NuaSense's overview of smart irrigation in Kenya covers the drip kits, gravity systems and sensor platforms on either side of that choice, including low-cost kits a single house can run with no sensor at all. The probe is the last thing a greenhouse needs, after the filter, the pressure reducer and a bed you have scraped open to see where the water actually goes.